

How to Improve Slap Shot Speed: 7 Proven Techniques
Table of Contents
- Master Your Grip and Hand Placement
- Load Your Weight and Engage Your Kinetic Chain
- Perfect Your Wind-Up and Loading Phase
- Execute a Powerful Follow-Through
- Hockey Stick Flex Guide: Choosing the Right Flex for Speed
- How to Choose the Right Hockey Stick Kick Point
- Hockey Off-Ice Shooting Drills to Build Velocity
- Common Mistakes That Kill Your Shot Speed
- Frequently Asked Questions
Last Updated: October 2, 2026
Master Your Grip and Hand Placement
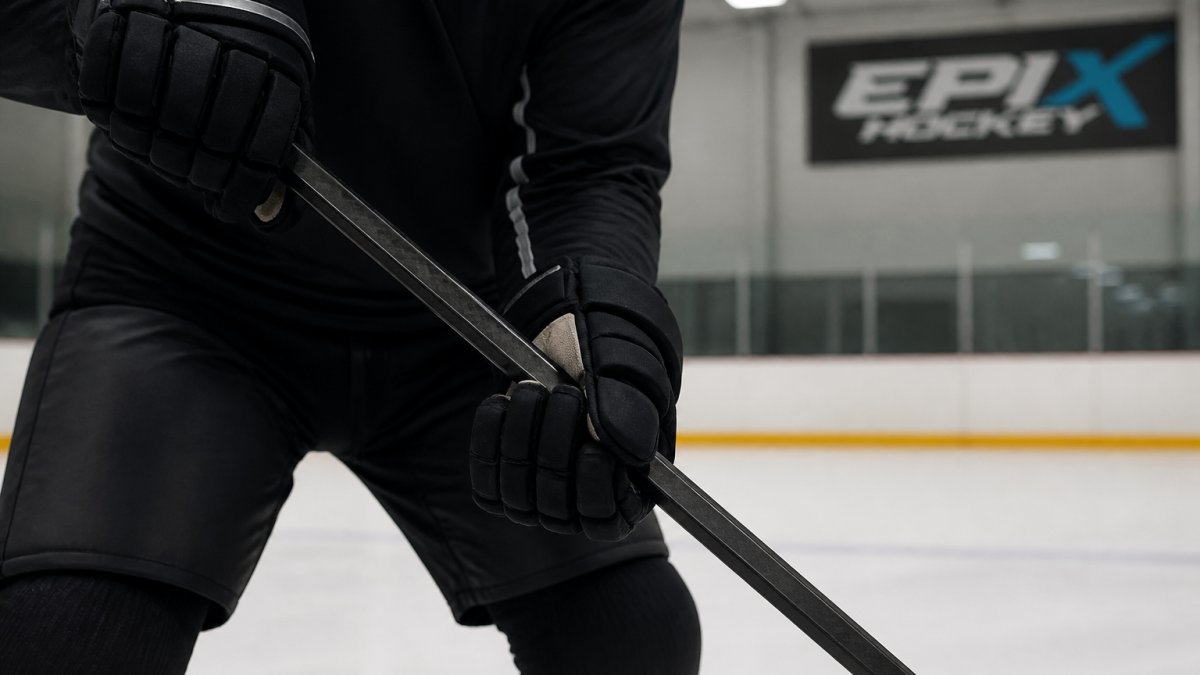
Your grip determines everything that happens after the puck leaves your stick, making it foundational to your ability to improve slap shot speed. Most players grip too tightly, which kills the snap and reduces the speed they can generate. The upper hand should sit near the top of the shaft with a firm but relaxed grip, while your lower hand positions itself approximately 20-30 centimetres from the blade. This spacing gives you control without creating tension that blocks energy transfer.
Your top hand should angle slightly inward, aligning with your shoulders, while your bottom hand stays relatively straight as a pivot point. Many players don't adjust grip until their shot speed plateaus, only then realizing the grip was the bottleneck.
Load Your Weight and Engage Your Kinetic Chain
The kinetic chain, legs generating power, core transferring it, arms and stick releasing it, is where most recreational players leave speed on the ice.
Start with feet shoulder-width apart, weight on the balls of your feet. Shift weight to your back leg during the wind-up; this is the loading phase.
Don't muscle the shot with your arms alone. Load your back leg and let your hips initiate rotation; your arms follow.
Perfect Your Wind-Up and Loading Phase
The wind-up stores energy in the stick shaft.
The Three Stages of the Wind-Up
Load (20-70% of the wind-up): Rotate your hips as your stick blade rises to waist height. Stick flex is critical here: too stiff and it won't load; too flexible and it releases prematurely. The correct flex bends smoothly, storing energy like a coiled spring. Hips rotate first, then shoulders, while your head stays still. Feel the stick shaft bend; this is the energy you'll release into the puck.
The Role of Stick Flex During Loading
Stick flex directly affects loading mechanics.
Psychological and Timing Cues
The best shooters commit to the motion with confidence.
Timing is critical: maximum stick bend should coincide with the start of acceleration.
Common Wind-Up Mistakes
Raising your stick too high wastes energy.
Loading too slowly prevents full stick bend.
Keep your eyes on your target throughout the wind-up.
Rushing acceleration before maximum bend reduces shot speed.
Execute a Powerful Follow-Through
Your follow-through is an integral part of the shot itself. A complete follow-through means your stick continues moving toward your target after contact, smooth and controlled.
The snap point occurs just before contact, where stick flex reaches maximum load and begins to release.
Your lower hand should stay connected to your body through the follow-through to keep your shot on line and prevent stick twist.
Hockey Stick Flex Guide: Choosing the Right Flex for Speed
Stick flex directly impacts speed generation. Flex is measured in pounds, the force required to bend the stick one inch.
Your body weight and strength determine the right flex. A general rule: flex should be roughly half your body weight.
A stick that loads and releases properly for your strength generates more velocity than one that doesn't match your profile.
Epix Hockey's customizable stick specifications let you dial in your exact flex preference. The LightSpeed Low kick point, featured on sticks like the DARKMATTER Senior, loads instantly at the bottom of the shaft for rapid energy transfer, particularly valuable if you prefer a stiffer flex that requires precise loading.

How to Choose the Right Hockey Stick Kick Point
The kick point is where the stick flexes most during your shot. A low kick point loads near the blade and releases quickly, ideal for snap shots. A mid kick point balances power and control.
To improve slap shot speed, a low kick point generally performs best. It allows the blade to load fully during your wind-up and release that energy explosively. The Synth Kick profile, found on sticks like the BLACK ICE (BLACK) Senior, adapts to multiple loading points, giving you flexibility to load low, mid, or high depending on your shot style.

Match your kick point to your natural shooting motion. Quick, aggressive wind-ups favor low kick points; slower, deliberate wind-ups suit mid kick points. Testing reveals which feels most responsive.
Hockey Off-Ice Shooting Drills to Build Velocity
Off-ice training builds strength and power that translates directly to faster shots. Train the muscles that drive each phase of the slap shot with sport-specific intent.
Rotational Core Power (Hip and Shoulder Separation)
Your core generates the torque that drives shot speed. Isolate rotational power while maintaining stability:
- Medicine Ball Rotational Throws (3 sets × 8 reps per side): Stand perpendicular to a wall, hold a medicine ball at chest height, and explosively rotate and throw the ball into the wall. This mimics the hip-to-shoulder separation that occurs during your wind-up. Use a ball heavy enough (4-8 kg) that you feel the effort in your obliques and core, not just your arms.
- Pallof Press (3 sets × 10 reps per side): Using a cable machine or resistance band anchored at chest height, stand perpendicular to the anchor point and press the handle straight out, resisting the rotational force. This anti-rotation hold teaches your core to stabilize while your hips and shoulders want to rotate, exactly what happens when you load the stick.
- Dead Bug with Rotation (3 sets × 12 reps per side): Lying on your back, extend opposite arm and leg while rotating your torso slightly toward the extended side. This builds core endurance and teaches sequential movement patterns.
Lower Body Power and Weight Transfer
Your legs initiate the kinetic chain. Without explosive lower body strength, weight transfer becomes sluggish and shot speed suffers:
- Single-Leg Squats (3 sets × 6-8 reps per leg): This exercise builds unilateral leg strength and mimics the loading phase when your weight shifts to your back leg. Control the descent and drive through the heel on the way up.
- Lateral Lunges with Pause (3 sets × 8 reps per side): Step laterally, sink into the lunge, pause for one second, and drive back to center. This strengthens the adductors and glutes needed for hip rotation and lateral stability on the ice.
- Box Jumps (3 sets × 5 reps): Explosive vertical jumps train your fast-twitch muscle fibers and teach your body to generate power quickly. Land softly and reset between reps rather than bouncing continuously.
- Banded Lateral Walks (3 sets × 12 steps per direction): Loop a resistance band around your legs just above the knees and walk laterally against the resistance. This activates the glute medius, which stabilizes your hips during the shot.
Upper Body Stability and Shoulder Health
Your upper body must control the stick and prevent injury:
- Prone Row to External Rotation (3 sets × 8 reps per side): Lying face-down on an incline bench, row a dumbbell to your hip, then rotate your shoulder to bring the weight toward your chest. This strengthens the rear shoulder and rotator cuff, critical for controlling the stick through the follow-through.
- Landmine Press (3 sets × 8 reps per side): Using a landmine attachment or corner of a rack, press a barbell at a 45-degree angle. This mimics the pressing angle of your shot and builds unilateral shoulder stability.
- Inverted Rows (3 sets × 8-10 reps): Using a suspension trainer or barbell in a rack, row your body toward the bar. This strengthens your back and improves posture, which translates to better stick control.
Sport-Specific Loaded Movements
Teach your body the exact sequence of your shot without ice impact:
- Resistance Band Slap Shot Simulation (3 sets × 10 reps): Anchor a resistance band at waist height, grip the free end as you would a stick, and perform your full slap shot motion against the band's resistance. This trains the exact muscle firing pattern and timing of your on-ice shot.
- Weighted Stick Drills (3 sets × 8 reps): Using a stick slightly heavier than your game stick (add tape or use a training stick), perform your wind-up and follow-through in slow motion. This builds strength-endurance and reinforces proper mechanics under fatigue.
Programming Frequency
A balanced off-ice program runs 3-4 days per week, alternating between lower body power, upper body stability, and rotational core work. Rest days are essential; muscles adapt during recovery. Most players see improvements in shot speed within 4-6 weeks of consistent training.
Common Mistakes That Kill Your Shot Speed
Tension throughout your body kills shot speed.
Initiating the shot with your arms instead of your hips is widespread.
Incomplete weight transfer leaves speed on the ice.
Choosing stick specifications that don't match your profile wastes potential.
Neglecting the follow-through costs accuracy and consistency.
Improving slap shot speed requires attention to technique, equipment, and training.
At Epix Hockey, we've engineered sticks that respond to proper technique.
Frequently Asked Questions
What is the average speed of a professional slap shot?
Professional NHL players typically shoot slap shots between 128 and 160 km/h, with elite players exceeding 160 km/h. Shot speed depends on stick flex, player strength, technique, and biomechanics. Improving your form and equipment can help you approach these speeds at your competitive level. Proper weight transfer and kinetic chain engagement are the biggest factors separating fast shots from slow ones.
How does stick flex affect slap shot velocity?
Stick flex directly impacts how much energy your shot releases. A properly matched flex allows you to load the shaft efficiently and transfer maximum force to the puck. Too stiff a flex and you can't bend the stick; too flexible and you lose control. The right flex for your body weight and strength lets you achieve the snap point that generates peak velocity. Matching your flex to your playing style is crucial for speed gains.
Can off-ice training really improve my shot speed on the ice?
Yes. Off-ice dryland training builds rotational power, core stability, and explosive force that transfer directly to your slap shot. Exercises targeting hip rotation, eccentric loading, and lateral mobility strengthen the kinetic chain you use to shoot. Players who combine on-ice technique work with consistent off-ice strength and conditioning see measurable improvements in release speed and consistency within 4-6 weeks.
What kick point should I choose to improve slap shot speed?
The best kick point depends on your shooting style and where you load the shaft. A low kick point (like LightSpeed Low) loads near the blade, giving you quick snap shots and one-timers with rapid energy release. A mid kick point offers balance between power and control. A high kick point builds more torque but requires a longer wind-up. Test different kick points to find which one lets you achieve maximum velocity while maintaining accuracy.