

How to Improve Release Speed: 7 Steps for a Faster Shot
Table of Contents
- What You'll Need Before You Start
- Step 1: Build Your Release Speed Setup Fundamentals
- Step 2: Master Wrist Hinge, Pronation, and the Release Point
- Step 3: Sequence Body Rotation and Energy Transfer
- Step 4: Reduce Tension and Build Timing and Rhythm
- Step 5: How to Increase Shot Power Without Losing Quickness
- Step 6: Hockey Stick Kick Point Explained (and How to Match It to Your Release)
- Step 7: Hockey Shooting Drills for Accuracy and Release Speed
- Frequently Asked Questions
Last Updated: September 17, 2026
What You'll Need Before You Start
Learning how to improve release speed starts with honest self-assessment. Release speed is how fast the puck leaves your blade once you decide to shoot, and it matters more than raw power in tight spaces. At Epix Hockey, we talk to players every week who can rip a slapshot but lose the puck battle on the half-wall.
Before your first drill session, gather a few basics:
- A stick with the right flex for your weight and strength
- 10-15 pucks (or practice balls for the driveway)
- A shooting pad or smooth surface
- A net, target, or marked spot on a wall
- Full gloves and helmet for on-ice work
- A phone to film your release in slow motion
Step 1: Build Your Release Speed Setup Fundamentals
Setup decides more than most players admit. A narrow stance, a top hand that sits too low, or standing tall before the shot will kill your snap no matter how hard you snap your wrists.
Stance, Hand Position, and Grip Pressure
Start with feet slightly wider than your shoulders, knees bent, and weight on the balls of your feet.
Try this checklist before every shot:
- Knees bent, chest up
- Top hand at hip height
- Bottom hand relaxed, not gripping tight
- Puck positioned off the mid-foot, not the heel
- Eyes on the target, not the puck
Step 2: Master Wrist Hinge, Pronation, and the Release Point
Wrist hinge and pronation separate a heavy shot from a slow one. Hinge means cocking your top wrist back as you load; pronation means rolling your top hand forward so the blade snaps through the puck.
Step 3: Sequence Body Rotation and Energy Transfer
Sequencing is the order your body fires: hips, core, shoulders, arms, stick. Get it wrong and you lose energy transfer before the puck even moves.
The Kinetic Chain From Hips to Stick Blade
Your hips start the rotation, your core carries it upward, and your arms finish the job. If your arms fire first, the chain breaks and your shot loses pop.
Step 4: Reduce Tension and Build Timing and Rhythm
Tension is the enemy of a fast release. Tight shoulders, a death grip, and a clenched jaw all slow you down. Timing and rhythm come from relaxed repetition, not from trying harder.
Try this progression:
- Take 20 shots at 50% effort, focusing on smooth motion
- Take 20 shots at 70% effort, keeping the same rhythm
- Take 20 shots at full speed, holding the rhythm you built
Step 5: How to Increase Shot Power Without Losing Quickness
Power and quickness compete. Adding muscle without mobility makes you slower, so build force in the hips and core while keeping your upper body loose enough to snap. Most shooting guides skip this entirely, mechanics only express the force your body can produce, and if your hips cannot rotate fast or your forearms cannot snap, no amount of wrist hinge will save your release.
Why Conditioning Affects Release Speed
A release is a short, violent burst of rotational force lasting a fraction of a second, so it runs on your anaerobic system and muscle elasticity, not endurance. Two implications:
- You train it with short, explosive efforts, not long grinds. Long steady-state cardio builds a base but does not make your release faster.
- You train it with low reps and full recovery. If you are gassed, you are practicing slow-twitch patterns, which is the opposite of what a snap shot needs.
A Weekly Off-Ice Block for Release Speed
Run this two to three times per week, separate from on-ice shooting days. Keep rest periods honest, the goal is quality of movement, not fatigue.
Hip rotation power (the engine of the shot)
- Med ball rotational throws against a wall: 3 sets of 6 per side, full recovery between sets
- Cable or band rotations: 3 sets of 8 per side, controlled return, explosive out
- Lateral bounds: 3 sets of 5 per side, stick the landing, reset each rep
Core stability (transfers hip force upward)
- Pallof press: 3 sets of 10 per side, slow out, resist the twist
- Dead bugs: 3 sets of 10 per side, ribs down, no arch
- Planks with a reach: 3 sets of 30 seconds, alternate reaching arm
Forearm and wrist (the final snap)
- Rice bucket digs: 60 seconds per hand, three rounds
- Wrist curls and reverse wrist curls: 3 sets of 12 each direction, light weight
- Wrist roller: 3 sets, up and down, no swinging
Mobility (keeps the chain from binding)
- Hip openers: 60 seconds per side before every session
- Thoracic spine rotations: 10 per side, slow
- Wrist and forearm stretches: 30 seconds per position, both arms
How to Sequence It Around Your Ice Time
Do not stack heavy off-ice power work immediately before a shooting session. Tired forearms produce sloppy mechanics, and sloppy mechanics get grooved fast. A workable pattern:
- Off-ice power and mobility on non-shooting days
- Shooting skill work on fresh legs, separate day
- One combined day per week if your schedule is tight, with power work after shooting, not before
The Trade-Off to Watch
Adding mass in the wrong places, chest, biceps, upper back tightness, can slow your release by reducing shoulder and wrist range. The fastest releases rarely belong to the biggest players; they belong to those whose hips fire hard and upper body stays loose. Train the engine, keep the chassis mobile.
Step 6: Hockey Stick Kick Point Explained (and How to Match It to Your Release)
Kick point is where your stick flexes and snaps back during the shot, the single biggest equipment variable in your release speed. Here is how it works, and how to match every spec to the way you shoot.
Kick Point: Where the Stick Loads and Fires
A low kick point loads fast, suiting quick snap shots and wristers in tight. Mid and high kick points need more load time but deliver more force on full shots. The trade-off is time versus force, you cannot max both with one profile.
| Kick Point | Best For | Release Style | Load Time |
|---|---|---|---|
| Low | Quick snap shots, in-tight chances | Fast, short load | Shortest |
| Mid | All-around play, wrist shots | Balanced load | Medium |
| High | Slap shots, heavy wristers | Longer load, more force | Longest |
Flex: Match It to Your Body, Not Your Ego
Flex is where most players get it wrong. A stick too stiff for your strength will not load properly, killing your release speed no matter how good your mechanics are. Too whippy loads easily but feels unstable on hard shots and passes.
Grip Size and Shaft Geometry: The Overlooked Variables
Grip size is the spec almost nobody talks about, and it directly affects how fast you can snap your wrists.
- Too thick a grip forces your fingers open and reduces the range your top wrist can hinge. That costs you snap.
- Too thin a grip makes you squeeze harder to control the stick, which locks your forearms and slows the release.
- The right grip lets your top hand hinge freely and your bottom hand slide without gripping tight.
Blade Stiffness and Curve
A stiffer blade transfers more energy on hard shots but feels dead on quick releases; a softer blade pops on snap shots but flexes on heavy ones. Curve affects release angle and how quickly the puck comes off the toe, a mid curve with a closed toe tends to release fastest.
How to Test a Stick for Your Release Style
You cannot tell from a spec sheet whether a stick fits your release. Test it:
- Take 10 snap shots with no wind-up. Does the puck come off fast, or does it feel like you are pushing it?
- Take 10 wrist shots with a normal load. Can you feel the stick bend and snap back?
- Take 5 shots in tight, off one foot. Does the stick load fast enough for the situation?
- Check your grip after 20 shots. If your forearms are burning, the grip is too thick or you are squeezing too hard.
Step 7: Hockey Shooting Drills for Accuracy and Release Speed
Hockey shooting drills for accuracy and release speed work best when you train both at once. A fast shot that misses the net does not score. Build drills that force you to pick a target and release quickly.
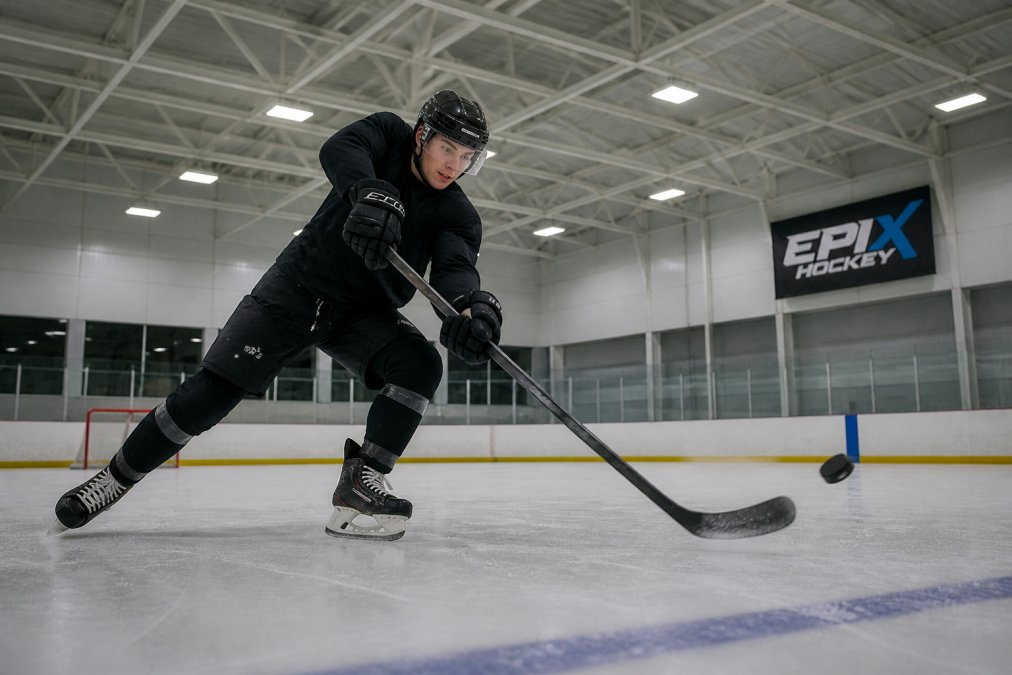
Try these on-ice drills:
- Quick release reps: 20 snap shots from the slot, target top corners, no wind-up
- Off-foot shots: shoot while transferring weight, 15 reps per side
- One-timer feeds: partner feeds pucks for direct releases
- Target corners: place targets in all four corners, alternate each shot
- Fatigue shots: 10 shots after a hard skate, mimicking game legs
Off-Ice Drills You Can Do in a Driveway or Garage
You do not need ice to build a faster release. A shooting pad and a bucket of pucks in the driveway will do.
- Wrist snap reps: 50 shots focusing only on the snap, no power
- Quick release ladder: 5 shots, rest 30 seconds, repeat 6 times
- Blade-only work: shoot with a weighted puck to build forearm strength
- Wall ball: throw a tennis ball against a wall with a wrist snap motion
Frequently Asked Questions
What is the most important factor for a faster hockey shot release?
Wrist hinge and pronation at the release point matter more than raw arm strength. The quick snap of your top hand rolling over as the puck leaves the blade is what generates the final burst of speed. Pair that with a stick flex and kick point matched to your shooting style, and you will see a faster release without changing your entire motion. Timing and rhythm across the whole body feed into that snap.
How does stick flex affect your release speed?
A flex that is too stiff for your weight and strength means you cannot load the shaft, so the stick returns little energy. A flex that is too whippy loads easily but loses accuracy and control. Customizable stick specifications let you dial in flex so the shaft bends and snaps back in sync with your release.
Can off-ice training help improve my shot release speed?
Yes. Off-ice work builds the mobility, core strength, and wrist and forearm conditioning that support a quicker release. Rotational medicine ball throws, band-resisted wrist snaps, and stickhandling with a weighted ball all carry over to the ice. Even 10 to 15 minutes a few times a week adds up. Pair off-ice work with on-ice shooting drills for accuracy so your mechanics stay sharp as your strength improves.
Does using a lighter hockey stick improve release speed?
A lighter stick can help you get the blade through the shooting zone faster, which supports a quicker release. But weight alone is not the whole story. Balance, kick point, and how the shaft loads matter just as much. A stick that feels light but has a kick point that does not match your shooting motion will not give you the return force you want. Test different specs to find what actually feels fastest in your hands.
Improving release speed takes patience, film work, and the right stick in your hands. If your mechanics are solid but your shot still feels slow, the stick might be the missing piece. Epix Hockey builds customizable sticks with aerospace-grade carbon fiber, proprietary kick points like Neo-Mid and LightSpeed Low, and specs tailored to your flex and curve. Get started with Epix Hockey and find the setup that matches your release.