

5 Best Hockey Training Aids for Shot Accuracy
Table of Contents
- Quick Comparison: 5 Hockey Training Aids for Shot Accuracy
- 1. High-Performance Hockey Stick (The Foundation of Every Accurate Shot)
- 2. Shooting Targets: Turning Repetition into Muscle Memory
- 3. Hockey Shooting Pads for Home Practice
- 4. Passing Rebounders for Puck Reception and Stickhandling
- 5. Balance Boards and Dry-Land Training Tools
- How to Improve Hockey Shot Accuracy Off-Ice
- Hockey Release Speed Training: Drills That Actually Work
- Frequently Asked Questions
Last Updated: September 2, 2026
Most players chase shot accuracy by shooting more with the wrong equipment, on the wrong surface, without the feedback needed to improve. At Epix Hockey, we've identified five specific hockey training aids that separate players who develop genuine shooting precision from those who just log hours without progress.
This guide covers the 5 best hockey training aids for shot accuracy, with surface-compatibility notes, age and skill-level progressions, and drill frameworks you can run today.
Quick Picks:
- Best Overall: High-performance hockey stick, the foundation everything else builds on
- Best for Repetition Training: Shooting targets, turn dry-land sessions into measurable muscle memory work
- Best for Home Practice: Shooting pads, synthetic surfaces that let you train anywhere
- Best for Puck Reception: Passing rebounders, develop stickhandling and puck reception simultaneously
- Best for Biomechanics: Balance boards and dry-land tools, fix your shooting mechanics at the root
Quick Comparison: 5 Hockey Training Aids for Shot Accuracy
Training Aid |
Primary Benefit |
Best Skill Level |
Surface Needed |
Price Range (CAD) |
|---|---|---|---|---|
High-performance stick |
Release speed + accuracy |
All levels |
Ice or shooting pad |
$199.99 - $269.99 |
Shooting targets |
Target placement + muscle memory |
Beginner to elite |
Any net |
Low cost |
Shooting pads |
Off-ice puck control + shot mechanics |
All levels |
Garage, basement |
Moderate |
Passing rebounders |
Puck reception + stickhandling |
Intermediate to elite |
Any flat surface |
Moderate |
Balance boards |
Biomechanics + lower-body stability |
Intermediate to elite |
Any flat surface |
Low to moderate |
1. High-Performance Hockey Stick (The Foundation of Every Accurate Shot)
A stick that doesn't match your shooting style, flex, or kick point forces compensations in your mechanics that no amount of repetition will fix. You're drilling bad habits faster.
The relationship between kick point and shooting accuracy is direct. A low kick point loads energy at the bottom of the shaft, ideal for quick-release snap shots and one-timers. A mid kick point loads progressively through the shaft, producing a balanced, controlled release suited to players who prioritize wrist shot accuracy. A hybrid kick point adapts to multiple shooting motions depending on the shot type.
According to Hockey Canada's player development resources, proper equipment fit is consistently identified as one of the most overlooked factors in youth player development.
DARKMATTER: Built for Release Speed
The DARKMATTER is the first titanium-infused carbon hockey stick built specifically around speed. Constructed with Bladerunner CRBN and Boron24x Fibres, the LightSpeed Low kick point loads instantly at the bottom of the shaft for faster energy transfer on snap shots and one-timers.

Specs at a glance:
- Senior (67", 350g, C-Shape taper): $249.99
- Intermediate (62", 315g, C-Shape taper): $229.99
- Junior (53", 285g, C-Shape taper): $199.99
Best for: Players who prioritize quick-release scoring in tight spaces.
ICECOLD and BLACK ICE: Precision and Adaptability
The ICECOLD uses a Neo-Mid kick point that loads progressively through the mid-shaft, delivering controlled, balanced release with exceptional puck feel. The D-Shape taper improves blade awareness through the shooting motion.

[The BLACK ICE](https://www.epixhockey.ca/products/icecold-black-sr) features a Synth Kick hybrid profile that adapts to wrist shots, snap shots, and slap shots within a single stick. For players who need one stick for every situation, this is the most versatile option.

Both are available in Senior ($249.99), Intermediate ($229.99), and Junior ($199.99). The Custom BlkIce at $269.99 allows complete specification, with custom orders shipping within 55-75 days.
2. Shooting Targets: Turning Repetition into Muscle Memory
Shooting targets convert unstructured repetition into deliberate practice by giving every shot a defined success or failure outcome. That feedback loop builds muscle memory, not volume alone.
According to Sport Science research on deliberate practice in skill acquisition, skill development accelerates significantly when practice includes immediate, specific feedback.
The most effective target placement focuses on the four corners of the net, where scoring probability is highest and goalie reach is lowest. Training pucks with reduced weight allow higher-repetition sessions without fatigue affecting mechanics.
Target training by skill level:
- Beginners: Start with large corner targets. Focus on consistent follow-through and release point.
- Intermediate: Reduce target size. Add movement before the shot.
- Advanced: Time-pressure targets. Have a partner call the target just before release, simulating game-speed decision-making.
Bottom corners, particularly the short side low, are among the most effective scoring zones and are frequently undertrained.
3. Hockey Shooting Pads for Home Practice
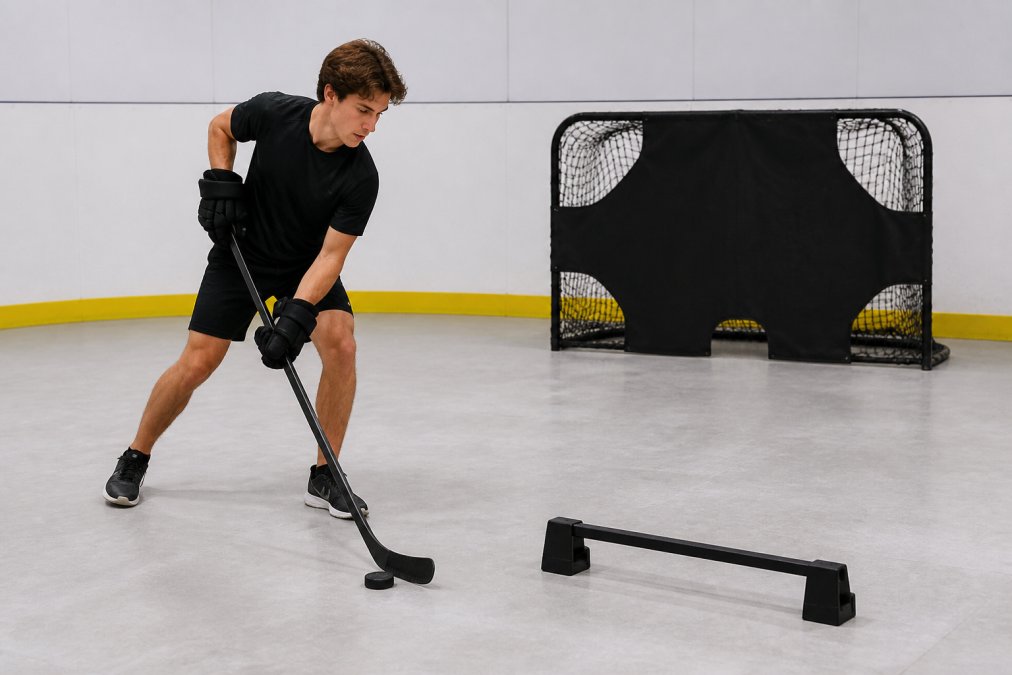
Off-ice training is where shot accuracy is actually built. A shooting pad makes quality dry-land training reps possible between ice sessions.
A hockey shooting pad is a synthetic surface designed to replicate the friction reduction of ice, allowing players to shoot with a real puck and full stick mechanics in any off-ice environment.
Quality shooting pads maintain consistent surface friction and impact resistance. A surface that wears unevenly introduces variability that undermines consistency.
Surface Compatibility: What Works Where
Surface Type |
Recommended Pad Material |
Puck Behavior |
Notes |
|---|---|---|---|
Concrete garage floor |
High-density HDPE or UHMW |
Consistent glide |
Best overall combination |
Hardwood or laminate |
Softer synthetic ice tiles |
Reduced friction on edges |
Protect floor from blade |
Carpet |
Not recommended for shooting |
Unpredictable |
Use for stickhandling only |
Asphalt driveway |
Thicker HDPE panels |
Acceptable glide |
Watch for surface irregularities |
Blade protectors prevent damage to your blade edges when moving to and from the setup. Using a shooting pad without them will change how the stick loads during the shot.
Training pucks designed for synthetic ice have a slightly different weight and slide profile than regulation pucks. For shooting mechanics training, they're preferable. For accuracy target work, use regulation weight.
4. Passing Rebounders for Puck Reception and Stickhandling
Most accuracy problems aren't about shooting mechanics, they're about what happens in the half-second before the shot: puck reception, weight transfer, and the stickhandling sequence that sets up the release.
A passing rebounder trains exactly that transition. The player passes to the rebounder, receives the puck in motion, and shoots, replicating the game-speed sequence of receiving a pass and releasing quickly.
According to Hockey development principles from the Coaching Association of Canada, puck reception and stickhandling fluency directly influence shooting accuracy in game situations.
What to look for in a rebounder:
- Consistent rebound angle for early development
- Adjustable tension or angle to simulate different pass speeds
- Durable base that maintains position during repeated impact
Rebounder drills for puck control:
- Forehand receive, immediate wrist shot to corner target
- Backhand receive, transfer to forehand, snap shot
- Two-touch stickhandling sequence before release
- One-timer from the rebounder (advanced)
The backhand drill is the one most players skip. Backhand puck reception is a genuine weak point for most players, and training it specifically produces noticeable game-day improvements.
5. Balance Boards and Dry-Land Training Tools
Shot accuracy has a biomechanics foundation that most players never address. The shooting motion originates from the lower body, weight transfer, hip rotation, and lower-body stability determine where your release point lands, shot after shot.
Balance board training improves the stability and weight transfer mechanics that determine consistent shot placement. Players who train on balance boards report more consistent shot placement because the underlying motor pattern becomes automatic.
Dry-land training tools also include resistance bands for shooting motion simulation and weighted pucks for building puck velocity. Keep weighted puck sessions short and focused to avoid fatigue-based mechanical errors.
Dry-land training essentials:
- Balance boards: Lower-body stability, weight transfer, shooting mechanics
- Resistance bands: Shooting motion strength, follow-through reinforcement
- Weighted training pucks: Puck velocity, wrist and forearm strength
- Agility ladders: Footwork patterns that set up shooting positions
The benefit of balance board training isn't balance for its own sake, it's that instability forces your body to find and reinforce its natural center of gravity during the shooting motion. That transfer shows up on ice.
How to Improve Hockey Shot Accuracy Off-Ice
Improving hockey shot accuracy off-ice requires consistent, structured dry-land training that targets release mechanics, target placement, and puck reception. The players who improve fastest combine deliberate target practice with biomechanics work and game-speed puck reception drills.
Step 1: Fix the equipment first. Wrong flex, wrong kick point, wrong length create mechanical compensations that no training volume will overcome.
Step 2: Build the base with target training. Start with large targets at consistent distances. Focus on follow-through and release point consistency before adding velocity.
Step 3: Add surface-appropriate shooting pad work. Move to a shooting pad setup that matches your training environment. Consistent puck behavior is essential for building reliable muscle memory.
Step 4: Introduce receive-and-shoot sequences. Add a rebounder to your setup and replace static shooting drills with receive-and-shoot sequences. This is where real game-accuracy transfer happens.
Step 5: Train the biomechanics separately. Add balance board and resistance band work as a separate session component. Build the foundation, then apply it.
Progression by Age and Skill Level
Age/Level |
Primary Focus |
Key Drill Type |
Equipment Priority |
|---|---|---|---|
Youth (8-12) |
Shooting mechanics, fun |
Large targets, short distance |
Properly sized stick first |
Bantam/Midget (13-17) |
Release speed, accuracy |
Corner targets, rebounders |
Shooting pad + targets |
Adult recreational |
Consistency, puck reception |
Receive-and-shoot sequences |
Full setup |
Competitive/elite |
Shot velocity + placement under pressure |
Time-pressure drills, one-timers |
Custom stick specs + full setup |
Youth players benefit most from oversized targets and shorter shooting distances. The goal is building correct mechanics, not hitting small targets at distance. Competitive adult players should train almost exclusively with game-speed sequences. Static shooting drills at this level have limited transfer value.
Hockey Release Speed Training: Drills That Actually Work
Release speed training works best when training aids function as a system rather than individually. The drills with the highest transfer to game accuracy combine stick biomechanics, surface conditions, and puck reception.
The three drills with the highest transfer to game accuracy:
1. The Quick-Release Sequence Set up on a shooting pad 5-7 metres from a net with corner targets. Receive a pass from a rebounder, take one stickhandling touch to set your position, and release to a specific target. The constraint: the shot must leave your stick within 1.5 seconds of puck reception. This trains where in the shooting motion you commit to releasing.
2. The One-Timer Progression Start with a stationary one-timer from a rebounder set at a 45-degree angle. Once you're hitting your target consistently, add lateral movement before the shot. The movement component replicates game conditions and exposes any instability in your weight transfer.
3. The Backhand-to-Forehand Transfer Receive a backhand pass, transfer to forehand, and release to a corner target. This uncomfortable drill is valuable because puck velocity and accuracy on the backhand-to-forehand transfer separates players who can only score from their strong side.
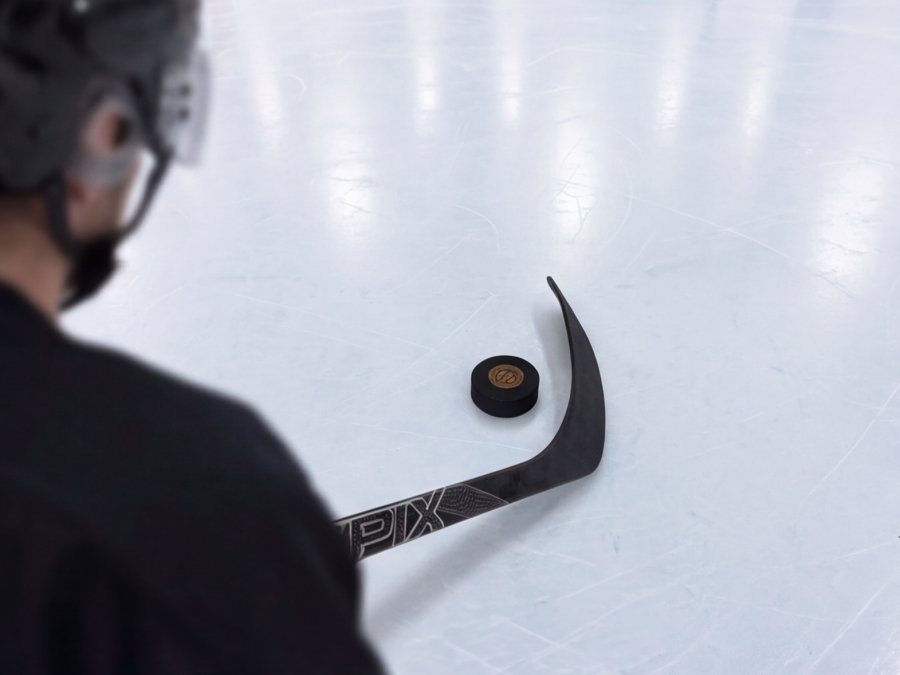
The real difference between players who improve their shot accuracy and those who plateau comes down to whether they're training with intention or just logging reps. The drills above work because they replicate the conditions, puck reception, time pressure, and specific targets that actually matter in a game.
For equipment that supports this kind of training at every level, the Hockey Canada equipment guidelines for player development consistently point toward proper stick fit as the non-negotiable starting point.
Shot accuracy develops from the right equipment paired with structured, surface-appropriate training. Epix Hockey's DARKMATTER, ICECOLD, and BLACK ICE sticks are engineered specifically around the kick point technologies that determine release speed and shot placement. Pair any Epix stick with the shooting pad, targets, and rebounder setup outlined above, and you have a complete off-ice accuracy development system. Shop the Epix Hockey collection and build the setup that matches your game.
Frequently Asked Questions
What are the most effective hockey training aids for improving shot accuracy?
The five most effective tools are a properly fitted high-performance stick, shooting targets, a shooting pad for home use, a passing rebounder, and a balance board for dry-land training. Each targets a different part of shooting mechanics. Consistent repetition across all five builds the muscle memory needed to place wrist shots, snap shots, and slap shots precisely under game pressure. The stick itself matters most: kick point and flex directly control your release point and follow-through.
What is the difference between shooting pads and synthetic ice for accuracy training?
Shooting pads are compact, affordable panels designed for stationary shooting practice at home. They reduce blade friction so training pucks slide realistically. Synthetic ice tiles cover a larger area and allow skating strides, making them better for simulating full game-day shooting conditions including lateral movement. For most players training at home, a quality shooting pad delivers the core benefit at a fraction of the cost. Synthetic ice makes sense when space and budget allow a more complete off-ice setup.
How does stick technology like kick point impact shot precision?
Kick point determines where the shaft loads and releases energy during a shot. A low kick point, like the LightSpeed Low profile in the Epix DARKMATTER, loads at the bottom of the shaft for a rapid snap shot or one-timer release. A mid kick point, like the Neo-Mid in the ICECOLD, loads progressively through the shaft for a balanced, accurate wrist shot. Matching kick point to your dominant shot type directly improves shooting accuracy and puck velocity by optimizing biomechanics at the release point.
Can off-ice training aids replicate game-day shooting conditions?
No training aid replicates ice exactly, but the right combination comes close. A shooting pad with friction-reducing surface handles puck reception and blade feel. Shooting targets train target placement under fatigue. A rebounder simulates pass reception before a shot. The biggest gap is skating momentum, which synthetic ice tiles partially address. Off-ice training builds shooting mechanics and muscle memory so that when you return to the ice, the movements are automatic rather than conscious.
How many repetitions should I do in an off-ice shooting session?
Quality matters more than raw volume. A focused session of 50 to 100 deliberate shots, where you aim at a specific target zone each time, builds shooting accuracy faster than 300 careless repetitions. Vary shot types across wrist shots, snap shots, and backhands to develop complete shooting mechanics. Short daily sessions of 15 to 20 minutes outperform one long weekly session for building durable muscle memory and consistent release speed over a full season.